Stencil Film – Oramask 811
Oracal Oramask 811 is a rigid, white stencil film that is ideal for various painting and etching techniques. It is specially designed to be low-tack so that it does not pull up paint when removed, and its extreme rigidity makes it an artist’s choice for works that require large stencils.
Description
Oramask 811 is often considered the best stencil vinyl for Cricut because it is thin, easy to work with and highly versatile.
This stencil vinyl is made from opaque white PVC film. It has a high degree of stiffness that makes it perfect for smooth, flat surfaces and extra-large art formats such as murals or large etchings. It is also excellent for making painted signs of any size, and it can be used to quickly create professional-quality designs on any flat surface.
The film has a clear, water-based adhesive back that is low-tack and easy to remove. The low-tack nature of the adhesive allows artists to place it on top of base layers of spray paint or latex paint without worrying about whether or not it will pull off patches of paint when it is removed.
Additional Details
- White dyed stencil film
- Matte, opaque finish
- Water-based, low-tack adhesive
- Rigid material
- 3-millimeter thickness
- Ideal for painting and etching
- Works best with water-based and latex paint
- Mounted on silicone-coated release paper
Additional information
| Size | 12 In x 24 In, 12 In x 10 Yd, 12 In x 50 Yd, 24 In x 5 Yd, 24 In x 10 Yd, 24 In x 50 Yd |
|---|
Application Instructions
– Create your design in your graphics software of choice.
– Load the vinyl into your plotter. It is best to perform a test cut before you begin making your design so that you can adjust your machine settings as needed and minimize mistakes. You can look up specific cut settings for your particular machine online if you are unsure.
– Carefully cut your design into the stencil film, and weed out any excess vinyl that you do not want to have on your stencil.
– Cover the finished stencil with transfer tape if you wish. Once the transfer tape is firmly secured to the stencil, slowly peel off the backing paper to expose the vinyl adhesive.
– Position your stencil on the desired surface, and smooth it out so that no air pockets are present.
– Starting in an upper corner, carefully peel the transfer tape downward at an angle. Make sure that the stencil is fully adhered to the painting surface as you do this. Otherwise, the transfer tape could peel up part of your stencil.
– Smooth the vinyl down one last time, starting from the center and working your way outward toward the edges.
– Paint as desired, and slowly remove the Oramask stencil from your finished piece. You may need to use a blade to remove smaller bits if your design is particularly intricate.
You may also like…
-

-
Sale!
- Specialty Vinyl
Oramask 813 Stencil Film
- $3.00 – $128.00
- Select options This product has multiple variants. The options may be chosen on the product page
-
Sale!
Related products
-
-
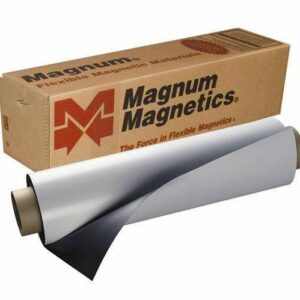
- Specialty Vinyl
Vehicle Magnetic Sheeting
- $4.99 – $73.00
- Select options This product has multiple variants. The options may be chosen on the product page
-
-
-
- Specialty Vinyl
Refrigerator Magnet Sheeting
- $3.78 – $91.00
- Select options This product has multiple variants. The options may be chosen on the product page
-